克隆代码到本地
1 | $ git clone https://git.oschina.net/wuyu/wuyu-plugin.git |
已有项目推送仓库
1 | $ git init |
说明: https://git.oschina.net/wuyu/wuyu-plugin.git为示例工程目录,个人的工程以自己的路径为准.
创建分之推送
1 | $ git branch develop |
工程提交修改
1 | $ git add ./* |
修改提交Commit
如果这是你最近一次提交并且没有push到远程分支,可用以下命令直接修改:
1 | [root@localhost vplus (master)]$ git commit --amend -m "your new message" |
其他情况可参考 https://stackoverflow.com/questions/179123/how-to-modify-existing-unpushed-commits
修改commit的用户名和邮箱
GIT修改当前工程的提交人信息
1 |
|
Git修改全局的工程提交人信息
1 | $ git config --global user.name "hunts" |
或则 或者直接在全局配置文件中修改
1 | [hunts@localhost logs ]$ cat ~/.gitconfig |
清空git默认的用户名和密码
1 | [hunts@localhost ~]$ git config --local --unset credential.helper |
Git全局忽略文件
有些场景下我们需要忽略Git项目中的某些文件,对于自己参与的项目,在项目下新建.gitignore文件即可。但如果本地项目较多,或者临时维护别人的项目,一般不会单独新建.gitignore文件,这时就可以选择全局性的忽略这些文件.
在当前用户目录下新建.gitignore_global文件
1 | [root@localhost ~]$ vim ~/.gitignore_global |
在.gitignore_global文件中添加要忽略的文件,和.ignore里边格式一致(每行一个,支持正则)
Git区分文件名大小写
例如: 创建一个文件readme.md,写入内容,提交到线上仓库,然后修改本地文件名为Readme.md,提交,会发现没有变化,无任何提示信息; 其实Git默认对于文件名大小写是不敏感的. 可以通过如下方式设置
- 配置 Git 使其对文件名大小写敏感
1 | [root@localhost master]$ git config core.ignorecase false |
- 修改本地文件名为大写
1 | [root@localhost master]$ mv readme.md Readme.md |
- 提交修改后的文件, 如果未生效, 请先删除线上仓库中的文件,重新提交
1 | [root@localhost master]$ git add Readme.md |
Git修改远程分支
仓库A:https://github.com/old/json
仓库B:https://gitee.com/new/json
从A切换到B,有3种方式
命令行修改远程地址
1 | [root@localhost ~]$ cd json |
先删除再添加新地址
1 | [root@localhost ~]$ cd json |
修改配置文件
1 | [root@localhost ~]$ cd json/.git |
Git项目创建Tag
查看项目Tag
1 | [root@localhost vplus (master)]$ git tag |
创建新的Tag
1 | [root@localhost vplus (master)]$ git tag v1.1.3 -m '增加工具类,生成实体类打标lombok注解' |
删除指定tag
1 | [root@localhost vplus (master)]$ git push origin --delete tag V1.1.3 |
上面我们通过git push origin v1.1.3推送了我们新创建的tag v1.1.3, 进度git主页查看
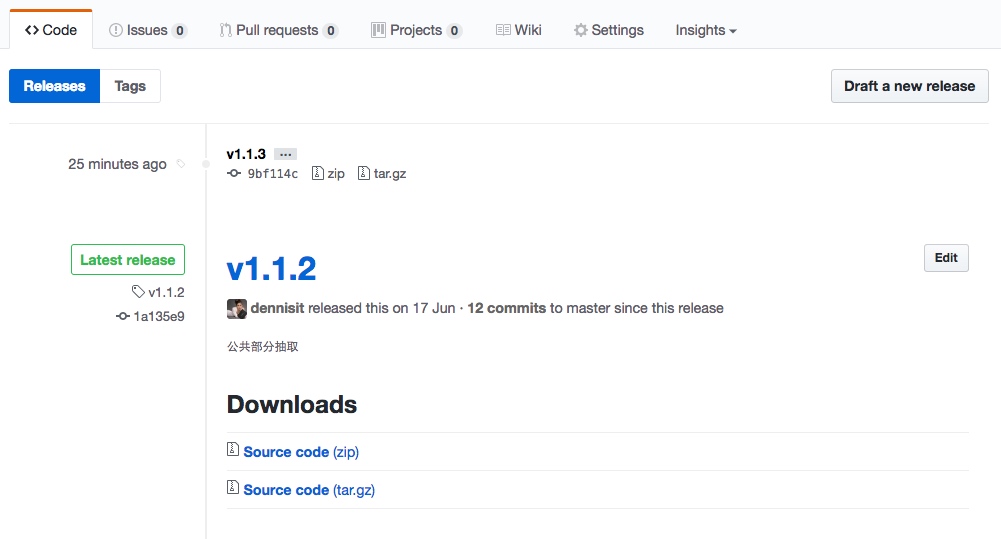
如图,可以看到新推送的tag已经展示在列表
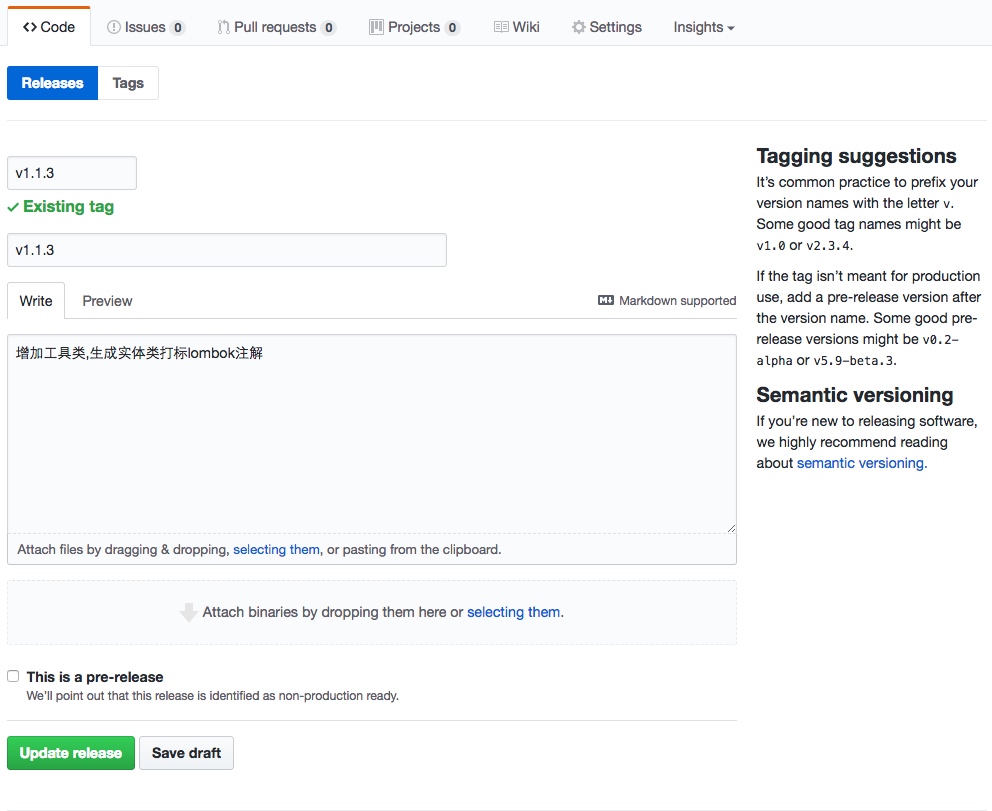
发布Release
点击上图中的【Draft a new release】进行release tag 创建.
查看发布效果
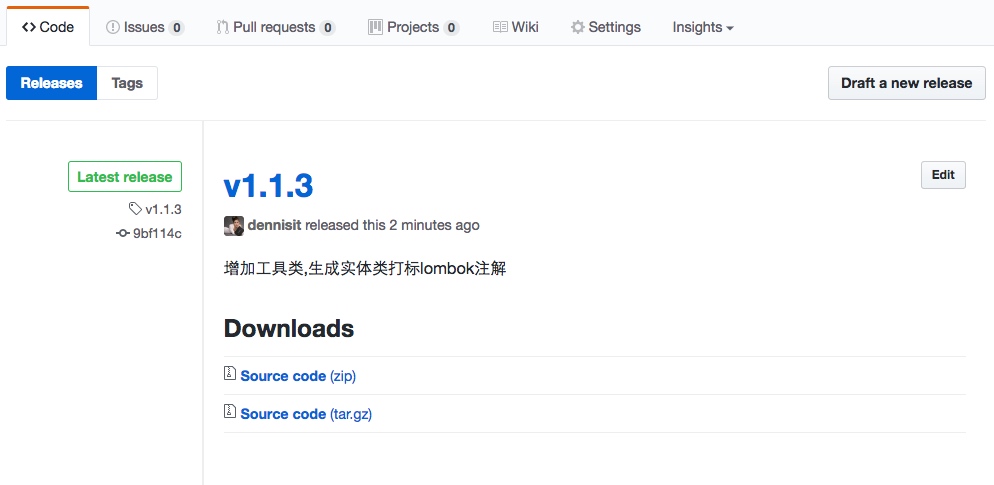
说明
上面的操作仅仅只是将我们最新更新的tag发布成了release, 如果想让别人直接引用你最细版本的包, 需要将最新更新版本RELEASE到中央仓库中(后续有时间补充如何推送)。
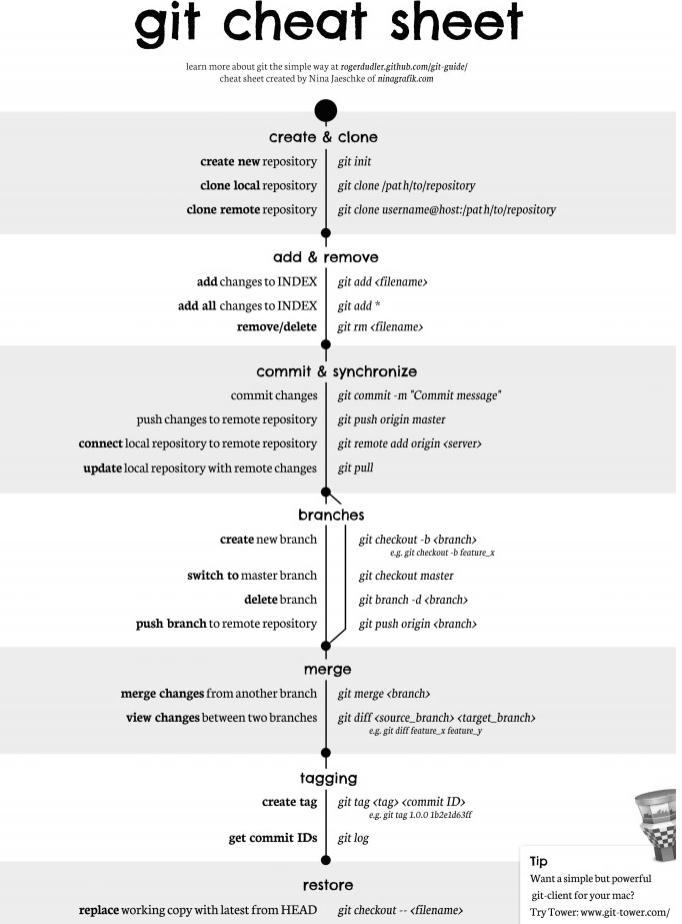
Git命令一览
Github作为图床
Github作为图床比较简单,只需要一个地址映射即可. 如下:
原始文件
图床地址
发布中央仓库
我们可以把自己沉淀的通用工具代码RELEASE到Maven中央仓库, 然后后期直接Maven引入使用, 方便统一管理更新.
创建发布工单
创建审核单, 网址: https://issues.sonatype.org/secure/Dashboard.jspa, 工单按照提示填写即可, 工单只有等审核通过后自己包对应的groupId才能进行包推送到中央仓库.
版本包防篡改
我们的工程包,安全方面上讲是不允许被非法篡改的,所以我们需要在打包的时候进行签名处理.
安装Gnupg
1 | [root@localhost ~]# yum install gnupg |
生成密钥
1 | [root@localhost ~]# gpg --list-keys |
说明: 上面的步骤如果不需要特别选定直接使用默认的即可,在设定密码过程中会弹出对话框让你设定私钥密码,该密码需要记住后面发布包时候需要用.
查看密钥
1 | [root@localhost local]# gpg --list-keys |
密钥推送服务器
注意: 这里发送的是公钥,和上面密钥列表中对应pub模块对应.
1 | [root@localhost local]# gpg --keyserver hkp://keys.gnupg.net --send-keys 30E287D1 |
Maven配置
该配置主要用于配置deploy包到oss.sonatype.org时的账号授权信息.
1 | [root@localhost apache-maven-3.5.2]# tree conf/ |
这里的un-zone为我的oss.sonatype.org账号ID
工程配置
引入仓库
1 | <distributionManagement> |
注意: 这里的推送地址id和maven的setting.xml中配置的server节点中的id保持一致.
发布插件
工程pom.xml文件中增加如下配置:
1 | <developers> |
执行发布并添加签名
1 | [root@localhost vplus]# mvn clean deploy -Prelease -Dmaven.test.skip=true -Dgpg.passphrase=密钥生成时设定的私钥密码 |
包公有化
上面我们将包大到maven仓库中, 但是此时并不能直接引入使用. 需要在
https://oss.sonatype.org/中进行包正式发布.
- 登录https://oss.sonatype.org
- 选择菜单【Staging Repositories】
- 搜索自己相关包关键词
- 选中要正式发布的包依次执行【close】、【release】(【close】会进行包发布合规性检测. 只有各个指标都通过了才能真正的release成功).